Following are the steps to guide
Getting Started
Before you begin, we recommend ensuring that, as a minimum, you have exported the Native CAD file for the product you want to create in Partful. You can find information on the supported CAD formats and detailed instructions on exporting the CAD in the preferred format in our guides here.
💡 Handy Tip: Information about the CAD data that you will also need to hand are:
-
The assembly file within the Zip file that represents the General Assembly (highest level assembly in the CAD hierarchy)
-
The attributes in the CAD data that represent the Engineering Part Number and Part Name
If you’re not sure, please ask your Design Engineer about these details when you obtain the Native CAD files.
If you have a Sales BOM prepared for the product, you will want to have that to hand as well, but if not, we will provide templates and guidance to help you to create a Sales BOM during the following step-by-step process.
Stage 1: Details & CAD
Starting from the Product Library, click on the Create Product tile (this is only accessible to Admin level users).
Enter the Product Name for the item you are creating, as you want it to be displayed in your Parts Catalogue.
Browse to select the Native CAD zip file that you want to use to create the 3D model of your product and then click the Start Upload button.

The progress of the zip file upload will be monitored.
Important Note: Please do not leave the page while the upload is in progress. you can Open a new tab if you want to work on something else while this is in progress.

When the upload is complete the wizard will automatically proceed to the next step.
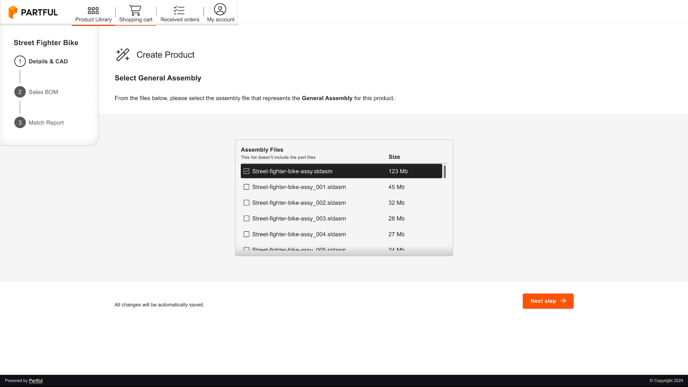
Now that your CAD Zip file has been uploaded, you will need to check the assembly files contained within the Zip file you provided and select which assembly file represents the General Assembly (also sometimes referred to as the High Level Assembly) for the product as a whole.
💡Handy Tip: More often than not, it will be the assembly file with the largest file size, so we have shown the size of each file and arranged them from largest to smallest to give you a head start.
Once you have selected the General Assembly for the product, you can click the
Next Step button to proceed.
Your CAD data will now be processed to generate your 3D model and metadata in Partful. This process can take a short while, so you can navigate away from this page if you wish, and the processing will continue in the background.
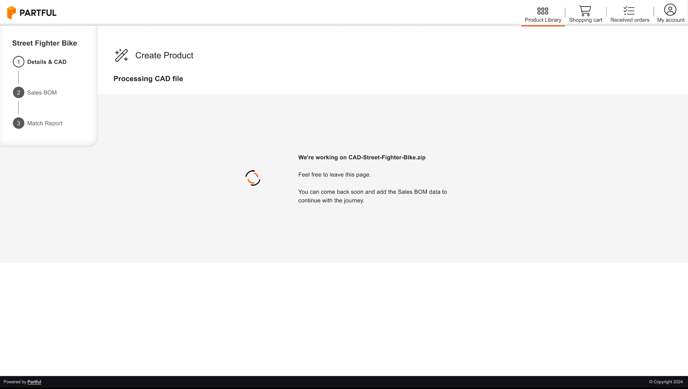
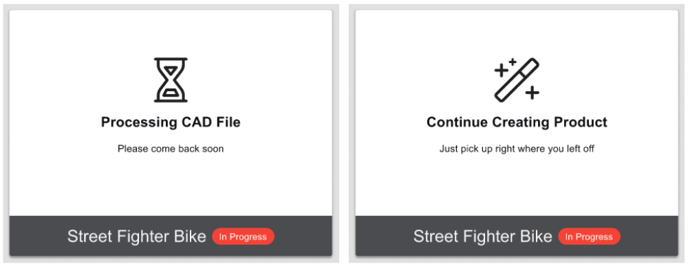
💡Handy Tip: If you do leave the wizard while the CAD is processing, you will find that a new product tile has been created in your Product Library to indicate that this is happening. Once the CAD is processed, the tile will return to showing that you can return to your product and pick up from where you left off to continue creating your new product.
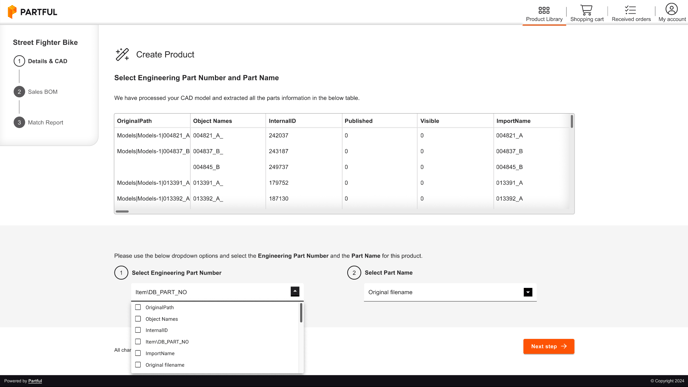
Lastly, once your CAD has been processed, when you return to the wizard, you will need to identify which of the data fields in your CAD represent the Engineering Part Numbers and Part Names that are used to identify each part in the CAD model. Look through the table representation of the product attribute data to check which column contains the Part Number and Part Name, then from the drop-down lists below, select the fields you want to assign for each value.
Stage 2: Sales BOM
Now that your CAD data has been processed and your 3D model has been created, you will need to identify the sellable parts and sales content for your product, in the form of a Sales Bill of Materials (known as a Sales BOM or SBOM).
-
To help you get started if you don’t have a Sales BOM already prepared, you can download the Partful Sales BOM template spreadsheet by clicking the Download Template button, and this will come pre-populated with the Part Numbers and Part Names contained within your CAD data as a starting point for you to build from and map your sales content against.
❗Important Note: Even if you already have a Sales BOM prepared, you will still need to download the template file, as you will need to provide your sales data in this specific format to ensure that your sales content can be efficiently and successfully ingested, and also that it can be matched to your CAD parts data too.
💡Handy Tip: A fully detailed guide on creating and managing Sales BOMs and Parts Matching can be found here
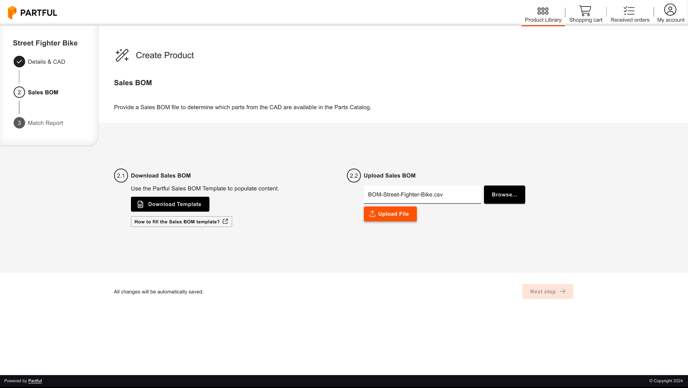
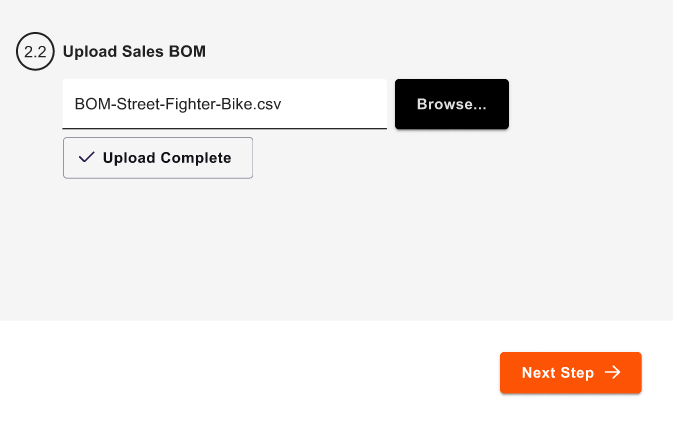
Once the file has uploaded successfully, you can click the Next Step button.
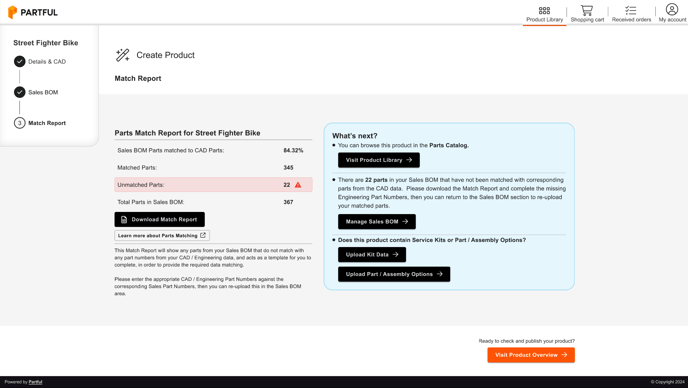
Stage 3: Match Report
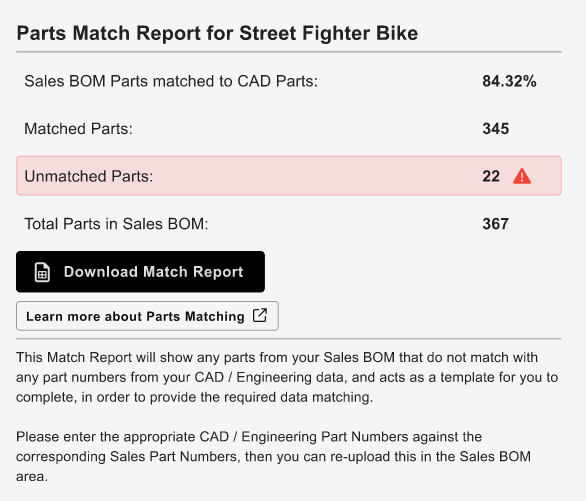
Now that you have provided your CAD data to create the 3D model and your Sales BOM to identify and apply sales content to the sellable parts, it is necessary to ensure that the data from these two sources has been successfully matched together.
You will be provided with a Match Report, to let you know what proportion of your Sales BOM data was able to be matched to your CAD data.
💡Handy Tip: A fully detailed guide on creating and managing Sales BOMs and Parts Matching can be found here.
Click the Download Match Report button to receive a spreadsheet of your Sales BOM data, showing which Sales Part Numbers have been matched to the Engineering Part Numbers in the CAD, and which ones have not (if any).
If there are sellable parts in your Sales BOM that have not been matched to the Engineering Part Numbers in your model, then you simply need to add the Engineering Part Numbers into the first column of the downloaded match file.
❗Important Note: Remember the original Partful Sales BOM Template that you downloaded in the previous Sales BOM stage? You can refer back to the Engineering Part Numbers that were provided to you in the original template file if you need these as a reference.
What's Next?
You now have a number of options to choose from depending on the outcome of your Match Report:
-
Click Visit Product Overview to complete the wizard process, preview your new product, and choose when you are ready to set the product Live in order to publish it to your EPC and have it viewable/purchasable by your dealers and customers.
-
Click Manage Sales BOM if you need to match more of your Sales Parts to your CAD Parts in the match report, and then re-upload your Sales BOM again to complete the necessary matches.
-
Click Visit Product Library if you wish to leave the product as a draft, and return back to it at a later stage.
Publishing Your Product to your Parts Catalog
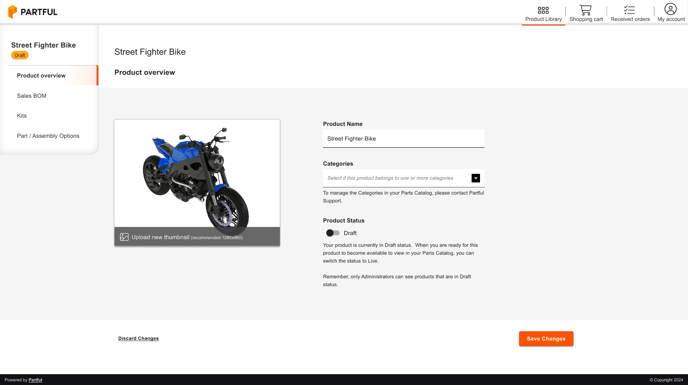
Once you have completed the step-by-step wizard process to create your new product, you can head to the Product Overview page within your Manage Product section to check the thumbnail and select the Category that you want your new product to be arranged into, as well as switching your product between Draft and Live status.
-
Thumbnail: The thumbnail image will be automatically generated from the 3D Model produced from your CAD data.
-
Product Name: The name of your product as it will be displayed in your Parts Catalog. You set this when you begun the Create New Product process.
-
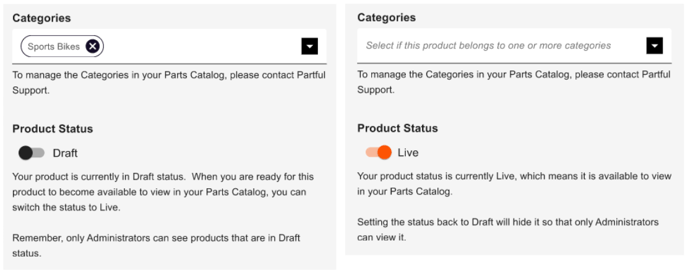
Categories: From the dropdown menu you can select as many categories and sub-categories as you want this product to be shown in within your main Product Library
💡Handy Tip: Not seeing any categories here? Please contact your Partful Customer Success representative to get these setup on your account.

-
Product Status:
-
Draft: the product has been created and is visible to Admin level users on your Partful account, but is not viewable/purchasable in your Parts Catalog yet.
-
Live: the product is published to your Parts Catalog and can be viewed/purchased by anyone with access to your EPC
-
Congrats! Your product is now live and you can start generating parts revenue! 🎉